

How To Install A Spigot Server
How to Install Spigot Minecraft Server on Ubuntu twenty.04
Spigot is a modified Minecraft server software based on CraftBukkit. It provides additional performance optimizations, configuration options and features while maintaining compatibility with all existing plugins and mods.
In this tutorial, you lot will learn how to build and install Spigot Server on a Ubuntu 20.04 based server and install plugins.
Prerequisites
-
A server running Ubuntu 20.04 with a minimum of 4GB RAM and 2 CPU Cores.
-
A not-root user with sudo privileges.
-
Everything is updated.
$ sudo apt update && sudo apt upgrade
-
Install the required packages.
$ sudo apt install wget apt-transport-https gnupg nano screen
Footstep 1 - Configure Firewall
The commencement step is to configure the firewall. Ubuntu comes with ufw (Uncomplicated Firewall) by default.
Cheque if the firewall is running.
$ sudo ufw status
You should get the following output.
Status: inactive
Allow SSH port to foreclose the firewall from breaking the current connection on enabling information technology.
$ sudo ufw allow OpenSSH
Allow port 25565 for the Spigot server to take connections.
$ sudo ufw allow 25565
Enable the Firewall
$ sudo ufw enable Command may disrupt existing ssh connections. Proceed with performance (y|n)? y Firewall is active and enabled on system startup
Check the status of the firewall again.
$ sudo ufw status
You should see a similar output.
Status: active To Action From -- ------ ---- OpenSSH Allow Anywhere 25565 ALLOW Anywhere OpenSSH (v6) Permit Anywhere (v6) 25565 (v6) Allow Anywhere (v6)
Stride 2 - Install Java and Git
Spigot installer needs Coffee and Git to work. Ubuntu 20.04 ships with OpenJDK 17 as the latest bachelor version of Java. Run the post-obit command to install information technology.
$ sudo apt install openjdk-17-jre-headless
Confirm the release.
$ java --version openjdk 17.0.1 2022-10-19 OpenJDK Runtime Environs (build 17.0.ane+12-Ubuntu-120.04) OpenJDK 64-Fleck Server VM (build 17.0.1+12-Ubuntu-120.04, mixed mode, sharing)
Install Git.
$ sudo apt install git
Step iii - Create a Minecraft user
The next step is to create a dedicated user for running the server.
$ sudo adduser minecraft
Switch to the newly created user.
$ sudo su - minecraft
Step 4 - Download and install Spigot
We volition build Spigot using the BuildTools.jar application. The starting time step is to switch to the abode directory.
minecraft:$ cd ~
Create a new directory for BuildTools and shift to it.
minecraft:$ mkdir buildtools && cd buildtools
Grab the BuildTools.jar file.
minecraft:$ wget -O BuildTools.jar https://hub.spigotmc.org/jenkins/job/BuildTools/lastSuccessfulBuild/artifact/target/BuildTools.jar
Build the latest stable version of Spigot.
minecraft:$ java -jar BuildTools.jar --rev latest
Depending on the available server resources, this process may take time to complete.
Check the proper name of the Spigot jar file created.
minecraft:$ ls apache-maven-3.6.0 BuildData BuildTools.jar BuildTools.log.txt Bukkit CraftBukkit Spigot spigot-1.18.ane.jar work
In our case, the name is.
Create some other directory for your Spigot Server and switch to it.
minecraft:$ cd ~ && mkdir server && cd server
Movement your Spigot jar file to the newly created server directory.
minecraft:$ mv ~/buildtools/spigot-1.xviii.1.jar ~/server/spigot.jar
Step 5 - Outset Spigot Server
To kickoff the Spigot server, we need to create a startup script that allows us to pass various Coffee parameters to optimize the server. Ad
Create and open the startup script for Spigot.
minecraft:$ sudo nano spigotstart.sh
Paste the following code in the file.
#!/bin/sh java -Xms3G -Xmx3G -Xx:+UseG1GC -XX:+ParallelRefProcEnabled -20:MaxGCPauseMillis=200 -Twenty:+UnlockExperimentalVMOptions -Xx:+DisableExplicitGC -XX:+AlwaysPreTouch -XX:G1NewSizePercent=30 -Xx:G1MaxNewSizePercent=40 -Xx:G1HeapRegionSize=8M -XX:G1ReservePercent=20 -20:G1HeapWastePercent=five -XX:G1MixedGCCountTarget=iv -Xx:InitiatingHeapOccupancyPercent=fifteen -Twenty:G1MixedGCLiveThresholdPercent=90 -XX:G1RSetUpdatingPauseTimePercent=v -XX:SurvivorRatio=32 -XX:+PerfDisableSharedMem -XX:MaxTenuringThreshold=one -Dusing.aikars.flags=https://mcflags.emc.gs -Daikars.new.flags=true -jar spigot.jar nogui
The parameter -Xms3G -Xmx3G configured the Java heapspace for 4GB of RAM. We accept left 1GB free in our case for the Os and any other stuff that it needs the ram for. Modify this to the amount of RAM y'all desire to allocate to the Spigot server. If your server has 16GB of RAM, yous should set the parameter to occupy 14 or 15GB of RAM.
Once finished, save the file by pressing Ctrl + 10 and entering Y when prompted.
Make the startup script executable.
minecraft:$ chmod +ten spigotstart.sh
Showtime your Spigot server for the get-go time.
minecraft:$ ./spigotstart.sh
The server will not start and instead cease, giving the post-obit message.
[14:14:21] [ServerMain/INFO]: You lot need to concord to the EULA in gild to run the server. Go to eula.txt for more than info.
Open eula.txt for editing.
minecraft:$ nano eula.txt
Ready the value of the variable eula to truthful.
#By changing the setting below to Truthful you lot are indicating your understanding to our EULA (https://account.mojang.com/documents/minecraft_eula). #Dominicus Dec 26 13:29:15 UTC 2022 eula=true
Once finished, save the file by pressing Ctrl + X and inbound Y when prompted. Advertisement
Before starting the server, permit u.s. configure it to run it as a service in the background.
Step 6 - Configure Spigot as a service
The server needs the shell to be running all the fourth dimension for it to piece of work, which is not ideal. Nosotros demand to create a service so that the server can outset automatically on boot and run in the background.
Exit out of the minecraft user.
minecraft:$ exit
Create a Spigot Service file and open information technology for editing.
$ sudo nano /etc/systemd/system/spigot.service
Paste the post-obit code.
[Unit of measurement] Description=SpigotMC After=network.target [Service] Type=forking User=minecraft Group=minecraft ExecStart=/usr/bin/screen -d -m -S minecraft /home/minecraft/server/spigotstart.sh ExecStop=/usr/bin/screen -S minecraft -p 0 -X stuff "stop$(printf \\r)" WorkingDirectory=/home/minecraft/server [Install] WantedBy=multi-user.target
Once finished, save the file by pressing Ctrl + X and entering Y when prompted.
Reload the service daemon.
$ sudo systemctl daemon-reload
Enable the service.
$ sudo systemctl enable spigot
Start the Spigot service.
$ sudo systemctl commencement spigot
Cheque the service status.
$ sudo systemctl status spigot ? spigot.service - SpigotMC Loaded: loaded (/etc/systemd/system/spigot.service; disabled; vendor preset: enabled) Active: active (running) since Mon 2022-12-27 09:15:25 UTC; 6s ago Process: 32011 ExecStart=/usr/bin/screen -d -thou -S minecraft /home/minecraft/server/spigotstart.sh (code=exited, sta> Main PID: 32012 (screen) Tasks: 25 (limit: 4691) Memory: 3.2G CGroup: /organisation.slice/spigot.service ??32012 /usr/bin/SCREEN -d -m -S minecraft /dwelling house/minecraft/server/spigotstart.sh ??32013 /bin/sh /dwelling house/minecraft/server/spigotstart.sh ??32014 java -Xms3G -Xmx3G -Twenty:+UseG1GC -Twenty:+ParallelRefProcEnabled -Xx:MaxGCPauseMillis=200 -XX:+UnlockEx> Dec 27 09:15:25 spigot systemd[1]: Starting SpigotMC... Dec 27 09:fifteen:25 spigot systemd[1]: Started SpigotMC.
Stride seven - Connect to Minecraft
At present that our server is upward and running, it is fourth dimension to connect to Minecraft. Launch your Minecraft game.
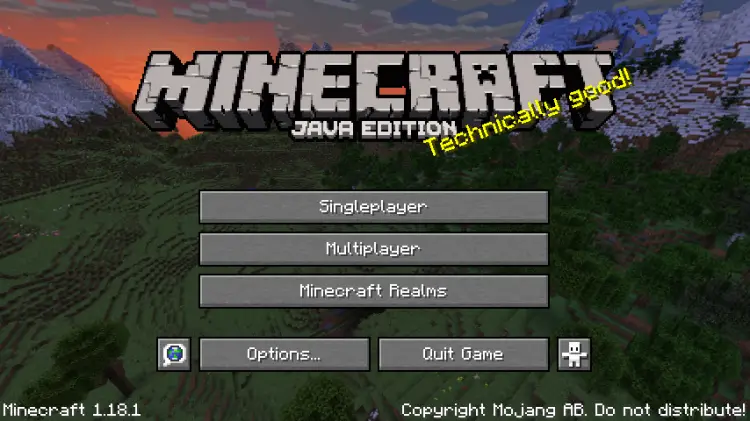
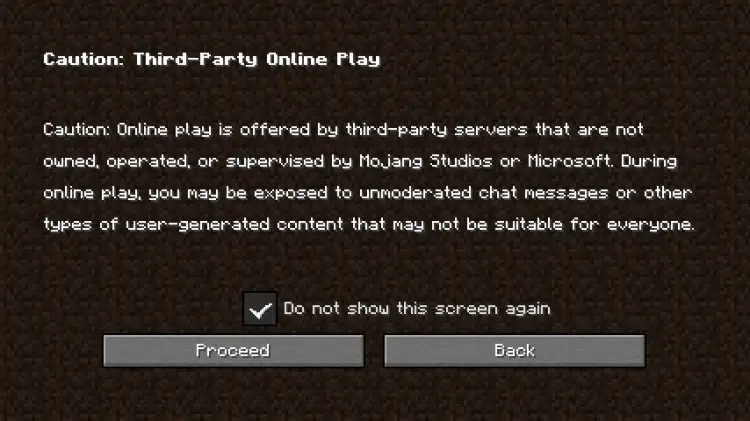
Click on the Multiplayer push button and ignore the warning for the futurity past checking the box,Do not show this screen again.
Click on Add Server button on the adjacent folio.
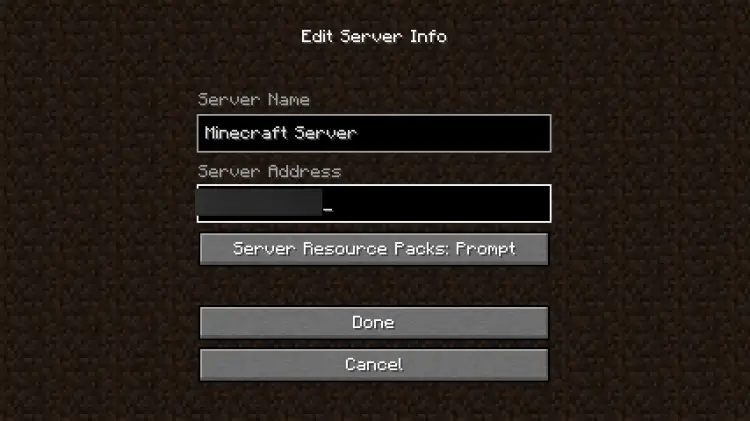
Enter your server'due south public IP accost and name. Click Done when finished.
Your Server will now appear on the list.
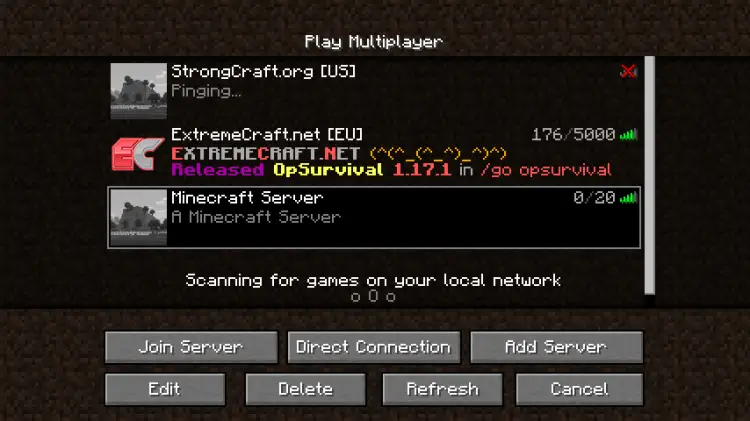
Click on your server name and printing the Join Server button to get-go the server. Your game will beginning before long.
You tin can ask your friends to join your server and play with them.
Stride viii - Customize Server Backdrop
You tin can customize your server past editing the /home/minecraft/server/server.backdrop file. We will become through some of the properties below.
-
Enable command blocks: Values bachelor are
trueandfalse.enable-command-cake=imitation
-
Gamemode: Values available are survival, creative, adventure, and spectator. They tin can also be defined by integers starting from 0 for survival, 1 for creative, 2 for chance, and 3 for spectator.
gamemode=survival
-
Difficulty: Values bachelor are peaceful, piece of cake, normal, and difficult. They can also be divers by integers starting from 0 for peaceful, 1 for easy, two for normal and 3 for hard.
difficulty=easy
-
MOTD: Stands for Message Of The Solar day. It is the message that is shown on the Server list page. Accepts a string value. Supports color, special characters and formatting codes. It should non be longer than 59 characters.
motd=A Minecraft Server
-
PVP: Enables the Player versus Player mode. Values available are
trueandfalse.pvp=true
-
Server Port: Defines the port on which the Minecraft server listens to. The default value is 25565.
server-port=25565
If you change the port value to something else, you will need to enable information technology in the firewall; otherwise, players won't be able to connect.
-
See the Minecraft wiki for more properties.
Y'all will need to restart your Spigot server after making any changes to these properties for them to accept effect.
$ sudo systemctl restart spigot
Pace 9 - Install Plugins
Y'all can download plugins from Spigot Resources or Bukkit Plugin pages.
If you download the plugin from Spigot, the following method won't work since it has been blocked. You will have to manually download the Jar file and move it to the server. But if yous are downloading from Bukkit, employ the following method to download straight to your server.
Download the .jar file of the plugin from the to a higher place pages to the /home/minecraft/server/plugins directory.
$ sudo wget -P /dwelling/minecraft/server/plugins/ --content-disposition <plugin url>
The flag --content-disposition ensures the file is downloaded with the correct file proper noun past making apply of the Content-Disposition headers.
For example, if you are downloading the WorldEdit plugin, this is how you will download it.
$ sudo wget -P /habitation/minecraft/server/plugins --content-disposition https://dev.bukkit.org/projects/earth edit/files/latest
To reload the plugin, restart your Spigot server.
$ sudo systemctl restart spigot
Pace ten - Update Spigot
Updating Spigot will require you to repeat step 4 of this guide to grab the latest version of BuildTools.jar file and then create a fresh spigot.jar file. Make sure you lot fill-in the old jar files and terminate the server before doing that.
Conclusion
This concludes our tutorial on installing and configuring the Spigot Minecraft server on a Ubuntu 20.04 based system. If y'all have any questions, mail them in the comments below.
Suggested articles
This feature is merely available to subscribers. Get your subscription here.

Source: https://www.howtoforge.com/how-to-install-spigot-minecraft-server-on-ubuntu-20-04/
Posted by: scotttrall1987.blogspot.com
0 Response to "How To Install A Spigot Server"
Post a Comment